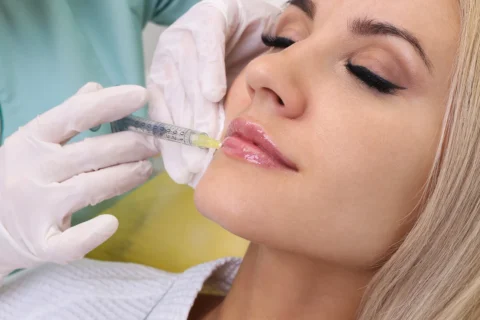

Hoping for plump lips? Discover the risks of lip fillers gone wrong and how to avoid them—your perfect pout depends on it.
Lip fillers gone wrong can lead to complications like lumps, asymmetry, overfilling, or vascular occlusion. These issues often stem from inexperienced injectors, improper technique, or low-quality products. Symptoms such as persistent swelling, pain, or bluish discoloration require immediate attention. If complications arise, contact your injector, apply cold compresses, and avoid strenuous activity.
Corrective options include hyaluronidase for dissolution or re-treatment by a qualified professional. To minimize risks, choose a board-certified injector, use FDA-approved fillers, and follow aftercare instructions carefully.
Common Lip Filler Complications

Lip fillers can transform your look, but when things go wrong, the results can be devastating. Let’s break down the most common complications you need to watch out for—and how to avoid them.
Lumps and Bumps
One of the most frequent issues after lip filler injections is the appearance of lumps or uneven texture. This happens when the filler isn’t evenly distributed or migrates to unintended areas.
- Why it happens: Inexperienced injectors, improper technique, or using the wrong type of filler for your anatomy.
- How to fix it: Massaging the area (if advised by your provider) or dissolving the filler with hyaluronidase.
- Prevention tip: Always choose a board-certified injector with extensive experience in lip augmentation.
Overfilled or “Duck Lips”
Overfilling is a telltale sign of bad lip filler. When your lips look unnaturally large or protrude too much, it’s a clear indicator that too much product was used.
- Why it happens: Overzealous injectors or clients pushing for dramatic results in one session.
- How to fix it: Dissolving the filler and starting fresh with a more conservative approach.
- Prevention tip: Start small. You can always add more later, but overfilling is harder to reverse.
Migration and “Filler Mustache”
Filler migration occurs when the product spreads beyond the lip border, creating a shadow or “mustache” effect above the upper lip.
- Why it happens: Injecting too close to the lip border or using a filler that’s too thin and prone to spreading.
- How to fix it: Dissolving the migrated filler and reapplying with a more precise technique.
- Prevention tip: Opt for a thicker, more cohesive filler designed for lip definition.
Swelling and Bruising
Some swelling and bruising are normal after lip fillers, but excessive swelling can be alarming.
- Why it happens: Trauma to the blood vessels during injection or an allergic reaction to the filler.
- How to fix it: Apply ice packs and avoid blood-thinning medications before your appointment.
- Prevention tip: Choose an injector who uses a cannula (a blunt-tipped needle) to minimize trauma.
Infection
Though rare, infections can occur if proper hygiene protocols aren’t followed during the procedure.
- Why it happens: Contaminated tools, unsterile environments, or improper aftercare.
- How to fix it: Antibiotics prescribed by your provider.
- Prevention tip: Ensure your injector follows strict sterilization practices and provides clear aftercare instructions.
Vascular Occlusion
This is one of the most serious complications, where filler blocks a blood vessel, cutting off blood supply to the tissue.
- Why it happens: Filler accidentally injected into a blood vessel.
- How to fix it: Immediate medical attention and dissolving the filler with hyaluronidase.
- Prevention tip: Only trust highly skilled injectors who understand facial anatomy and can recognize early signs of occlusion.
Allergic Reactions
While rare, some people may have an allergic reaction to the filler material, especially if it’s not hyaluronic acid-based.
- Why it happens: Sensitivity to the filler’s components.
- How to fix it: Dissolving the filler and switching to a hypoallergenic option.
- Prevention tip: Stick to hyaluronic acid fillers, which are biocompatible and reversible.
Asymmetry
Uneven lips are a common complaint, especially if the injector doesn’t account for natural asymmetry.
- Why it happens: Poor injection technique or uneven swelling.
- How to fix it: Touch-up sessions to balance the lips.
- Prevention tip: Choose an injector who takes the time to assess your natural lip shape and symmetry.
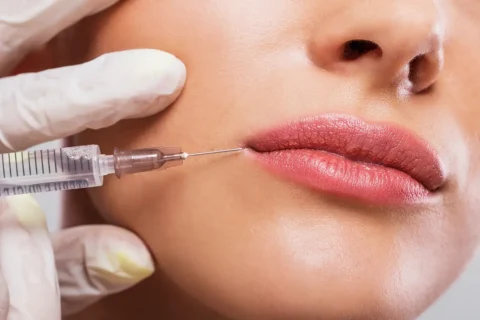
Causes of Botched Lip Fillers
Lip fillers can transform your look, but when they go wrong, the results can be devastating. Understanding the causes of botched lip fillers is crucial to avoiding complications and ensuring a safe, beautiful outcome. Let’s break down the key factors that lead to these issues so you can make informed decisions.
Inexperienced or Untrained Injectors
One of the most common causes of botched lip fillers is an injector who lacks proper training or experience. Lip augmentation is an art that requires precision, knowledge of facial anatomy, and an understanding of how filler interacts with your unique features. When injectors are inexperienced, they may:
- Inject filler too superficially, leading to lumps or visible bumps.
- Place filler incorrectly, causing asymmetry or an unnatural shape.
- Overfill the lips, resulting in a “duck lip” appearance.
Always verify your injector’s credentials and ask to see before-and-after photos of their work. A skilled professional will have a portfolio that demonstrates their expertise.
Use of Non-Medical-Grade Filler
Using non-medical-grade filler is a recipe for disaster. These products are often cheaper but lack the safety and quality standards of FDA-approved fillers like hyaluronic acid-based options. Non-medical-grade fillers can:
- Cause severe allergic reactions or granulomas (hard nodules under the skin).
- Migrate to other areas of the face, creating an uneven or distorted look.
- Lead to long-term complications that are difficult to reverse.
Never compromise on the quality of the filler used. Always insist on FDA-approved products and ask to see the packaging before the procedure.
Injection Errors
Even with the right product, injection errors can ruin your results. Common mistakes include:
- Injecting too deeply, which can cause filler to spread beyond the lips.
- Overfilling certain areas, leading to an unbalanced or unnatural appearance.
- Failing to account for your natural lip shape, resulting in a look that doesn’t suit your face.
A skilled injector will assess your facial structure, discuss your goals, and create a customized plan to achieve natural-looking results.
Unsanitary Facilities and Lack of Sterility
Infection is a serious risk when procedures are performed in unsanitary conditions. Botched lip fillers can occur when:
- The facility doesn’t follow proper sterilization protocols.
- Reused or contaminated tools are used during the procedure.
- The injector fails to maintain a sterile environment, increasing the risk of bacterial or viral infections.
Always choose a reputable clinic that adheres to strict hygiene standards. If something feels off during your consultation, trust your instincts and walk away.
Poor Patient Screening
Not everyone is a good candidate for lip fillers. Failing to screen patients properly can lead to complications, especially for those with:
- A history of cold sores or herpes simplex virus (HSV), which can be triggered by injections.
- Allergies to filler ingredients or numbing agents.
- Certain medical conditions that increase the risk of adverse reactions.
A thorough consultation is essential to identify any contraindications and ensure your safety.
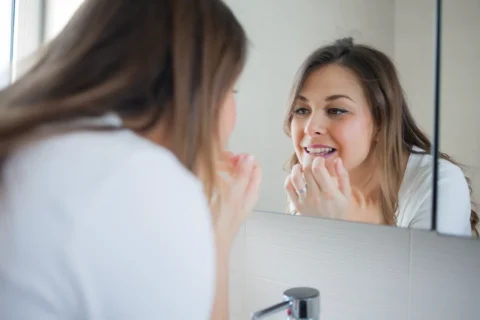
Signs of a Lip Filler Gone Wrong
When lip fillers go wrong, the signs are often unmistakable. You might notice unevenness, lumps, or bumps that weren’t there before. The lips may look overfilled, giving an unnatural “duck lip” appearance, or they might feel hard to the touch. In some cases, the filler migrates outside the lip border, creating a “mustache” effect above the upper lip. These are clear indicators that something isn’t right.
Swelling is normal after the procedure, but if it persists beyond a week or is accompanied by severe pain, redness, or warmth, it could signal an infection or an allergic reaction. Bluish discoloration, known as the Tyndall effect, can occur if the filler is placed too close to the skin’s surface. This happens when light scatters off the hyaluronic acid, creating a bluish tint.
Other red flags include:
- Asymmetry: One side of the lip looks significantly different from the other.
- Numbness or tingling: This could indicate nerve damage or compromised blood flow.
- Hard nodules: These can form if the filler clumps or if the body reacts poorly to the substance.
- Vascular occlusion: A rare but serious complication where the filler blocks a blood vessel, leading to tissue death if not treated immediately.
If you notice any of these signs, don’t wait. Contact your injector or a medical professional right away. Time is critical, especially in cases of vascular occlusion, where prompt treatment can prevent permanent damage. Remember, while lip fillers are generally safe when done by a skilled professional, complications can happen. Being informed and vigilant is your best defense.
Immediate Steps to Take After Complications

If you’ve experienced complications after lip filler injections, acting quickly and decisively is critical. The first 24-48 hours are the most important window to minimize risks and prevent long-term damage.
Step 1: Assess the Situation
- Swelling or Bruising: Mild swelling and bruising are normal, but if it’s excessive or asymmetrical, take note.
- Lumps or Bumps: Feel for irregularities under the skin. These could indicate improper filler placement or clumping.
- Discoloration: Watch for white, blue, or purple patches on your lips, which could signal vascular occlusion (a blocked blood vessel).
- Pain or Numbness: Persistent pain or loss of sensation is a red flag.
If any of these symptoms are severe or worsening, don’t wait—seek immediate medical attention.
Step 2: Contact Your Injector
- Call your provider immediately. A skilled injector will know how to assess and address complications.
- Provide clear details about your symptoms, including when they started and how they’ve progressed.
- If your injector is unavailable or dismissive, don’t hesitate to seek a second opinion from another qualified professional.
Step 3: Apply Cold Compresses
- Use a clean, cold compress (wrapped in a cloth) to reduce swelling and discomfort.
- Apply for 10-15 minutes at a time, with breaks in between, to avoid skin damage.
- Avoid direct ice contact, as it can cause frostbite on delicate lip tissue.
Step 4: Avoid Certain Activities
- No Touching or Massaging: Unless instructed by a professional, avoid manipulating the area, as this can worsen complications.
- Skip Strenuous Exercise: Increased blood flow can exacerbate swelling or bruising.
- Avoid Heat: Steer clear of hot showers, saunas, or sun exposure, as heat can increase inflammation.
Step 5: Seek Emergency Care for Vascular Occlusion
Vascular occlusion is a rare but serious complication where filler blocks a blood vessel, cutting off oxygen to the tissue.
Symptoms include:
- Severe pain
- White or blue discoloration
- Blistering or skin breakdown
If you suspect vascular occlusion:
- Go to the emergency room or a dermatologist immediately.
- Request hyaluronidase, an enzyme that dissolves hyaluronic acid fillers and can restore blood flow.
Step 6: Document Everything
- Take clear photos of your lips from multiple angles to track changes over time.
- Keep a written record of your symptoms, treatments, and communications with your provider.
- This documentation can be crucial if you need to pursue further medical or legal action.
Step 7: Follow Up with a Specialist
Even if symptoms improve, schedule a follow-up with a board-certified dermatologist or plastic surgeon. They can:
- Assess for any long-term damage.
- Recommend corrective treatments, such as hyaluronidase or laser therapy.
- Provide guidance on whether future filler treatments are safe for you.
Complications from lip fillers can be alarming, but taking these steps can help you regain control and protect your health. Remember, your safety and well-being come first—don’t hesitate to advocate for yourself.
Corrective Options for Botched Fillers

Lip fillers gone wrong can feel like a nightmare, but the good news is, there are several corrective options to help you regain your confidence and achieve the look you originally wanted. Let’s break down the most effective solutions for botched fillers, so you know exactly what to expect and how to move forward.
Filler Dissolution with Hyaluronidase
If your lip filler results are uneven, overfilled, or simply not what you envisioned, hyaluronidase is your go-to solution. This enzyme breaks down hyaluronic acid-based fillers, effectively dissolving them.
Here’s what you need to know:
- How it works: Hyaluronidase targets the hyaluronic acid molecules in the filler, breaking them down so your body can absorb them naturally.
- What to expect: The process is quick, often taking just 24-48 hours to see significant results. You may need multiple sessions depending on how much filler was used.
- Why it’s reliable: It’s a safe, FDA-approved method specifically designed for reversing hyaluronic acid fillers.
Corrective Filler Injections
Sometimes, the issue isn’t too much filler—it’s uneven distribution, lumps, or asymmetry. In these cases, a skilled injector can use additional filler to balance and refine your results.
- Key considerations: The injector must assess your current filler placement and use precise techniques to correct the problem.
- Pro tip: Choose an experienced professional who specializes in corrective work to avoid further complications.
Surgical Options for Severe Complications
In rare cases where fillers cause severe issues like vascular occlusion (blocked blood flow) or granulomas (hard nodules), surgical intervention may be necessary.
- Steroid injections: These can reduce inflammation and soften lumps caused by filler migration or improper placement.
- Grafting or excision: For extreme cases, surgical removal of the filler or affected tissue might be required.
Re-Treatments with Careful Technique
If you’re unhappy with your results but don’t want to dissolve the filler entirely, re-treatment with a different filler type or technique can help.
- Customized approach: Your provider may use a thinner filler or a different injection method to smooth out bumps or add subtle volume where needed.
- Timing matters: Wait at least 2-4 weeks after your initial treatment to allow swelling to subside before making adjustments.
Waiting for Natural Absorption
In some cases, the best option is to let your body naturally absorb the filler over time. This is a slower process, taking anywhere from 6-12 months, but it’s a non-invasive option if the issue isn’t severe.
- When it works: If the filler is only slightly overdone or uneven, waiting can save you from additional procedures.
- Limitations: This isn’t ideal for significant asymmetry or complications that require immediate attention.
What You Should Do Next
If you’re dealing with botched lip fillers, the first step is to consult a trusted, board-certified provider. They’ll assess your situation and recommend the best corrective option based on your unique needs. Don’t wait—addressing the issue early can prevent further complications and help you achieve the results you deserve.
Preventing Lip Filler Disasters

Lip fillers can enhance your natural beauty, but only if you take the right steps to prevent disasters. The key to avoiding lip filler mishaps lies in choosing the right injector, understanding the process, and following proper aftercare. Let’s break it down so you can make informed decisions and achieve the results you want—without the regrets.
Choose a Qualified Injector
Your injector’s credentials and experience are non-negotiable. Don’t settle for someone who isn’t board-certified or lacks extensive training in facial aesthetics. A skilled injector understands the anatomy of the lips, knows how to balance proportions, and can tailor the treatment to your unique facial structure.
- Research their qualifications: Look for certifications in dermatology or plastic surgery.
- Check their portfolio: Review before-and-after photos to assess their skill level.
- Ask about their experience: How many lip filler procedures have they performed?
A qualified injector won’t just inject filler—they’ll create a customized plan to enhance your lips while maintaining harmony with your overall facial features.
Understand the Risks and Safety Protocols
Lip fillers are generally safe, but complications can arise if proper protocols aren’t followed. Before committing to a clinic, ask about their safety measures.
- Ensure the clinic uses FDA-approved fillers.
- Confirm that the injector follows strict hygiene practices, such as using sterile equipment.
- Discuss potential risks, like swelling, bruising, or vascular occlusion, and how they handle emergencies.
A reputable clinic will prioritize your safety and be transparent about the process.
Start Small and Build Gradually
One of the most common mistakes is overfilling the lips. Starting with a small amount of filler allows you to assess the results and make adjustments if needed.
- Begin with a conservative amount: 0.5 to 1 ml is often enough for a natural look.
- Wait 2-4 weeks before adding more filler to avoid overcorrection.
- Communicate openly with your injector about your desired outcome.
Remember, it’s easier to add more filler later than to dissolve overfilled lips.
Follow Pre- and Post-Treatment Instructions
Your injector will provide specific guidelines to minimize risks and ensure optimal results. Ignoring these instructions can lead to complications.
- Avoid blood-thinning medications (like aspirin or ibuprofen) for at least a week before treatment.
- Skip alcohol and strenuous exercise for 24-48 hours post-treatment to reduce swelling.
- Apply ice packs to minimize bruising and avoid touching your lips excessively.
By adhering to these steps, you’ll set yourself up for a smoother recovery and better results.
Recognize the Warning Signs
Even with the best precautions, complications can occur. Knowing the warning signs allows you to act quickly and seek help if something goes wrong.
- Severe pain or discoloration: This could indicate vascular occlusion, a rare but serious complication.
- Excessive swelling or asymmetry: While some swelling is normal, persistent issues may require attention.
- Lumps or uneven texture: These can often be corrected with massage or additional treatment.
If you notice any of these signs, contact your injector immediately.